Showing posts with label The Princess. Show all posts

Monday, April 23, 2012

Braided Fauxhawk on natural hair...great for little girls/teens/adults!

Hi! :) Back with another style I picked up on Pinterest. I'm starting to feel kindof guilty, like I need to be a little more creative and get back to creating my own styles again. The last style I did on Ally, and Li'l Bit, were both from Pinterest. And the now The Princess is wearing a copycat style as well. But I had been in a styling rut for awhile, so at least some hair is getting done, right!?

Side note: See the laundry basket at the top of the stairs? Its calling me. I'm ignoring it. :)


The fauxhawk part....I had a very difficult time trying to figure out what to do with this part. I'd try something, but after half an hour or so realize I didn't like it, so try something else. Her hair is so thin and fine, its very difficult to get a roll or twist of any sort to stick. I'm actually not so sure I like this either, but it survived the night unscathed, so its a go, at least for now. :)

See that small child? Someone should tell her mother to do her hair. ;)


I like this because it is versatile; you can finish the middle in a variety of ways. (As a matter of fact, I am going to try the same style on Li'l Bit, and hers will be finished quite differently.) I promised The Princess that  toward the end of the week, I would take out the roll and she could rock her fauxhawk wild and free, 'rock star style', as she put it.  I like that the braids are small, so it should last a significant amount of time. I like that it didn't take long to finish, maybe about an hour? I like that she loves it. :)

Here is the style I was attempting to copy:


I just love this!


Monday, April 16, 2012

Protective Style for Natural Hair: Braided bantu knots with uneven parts

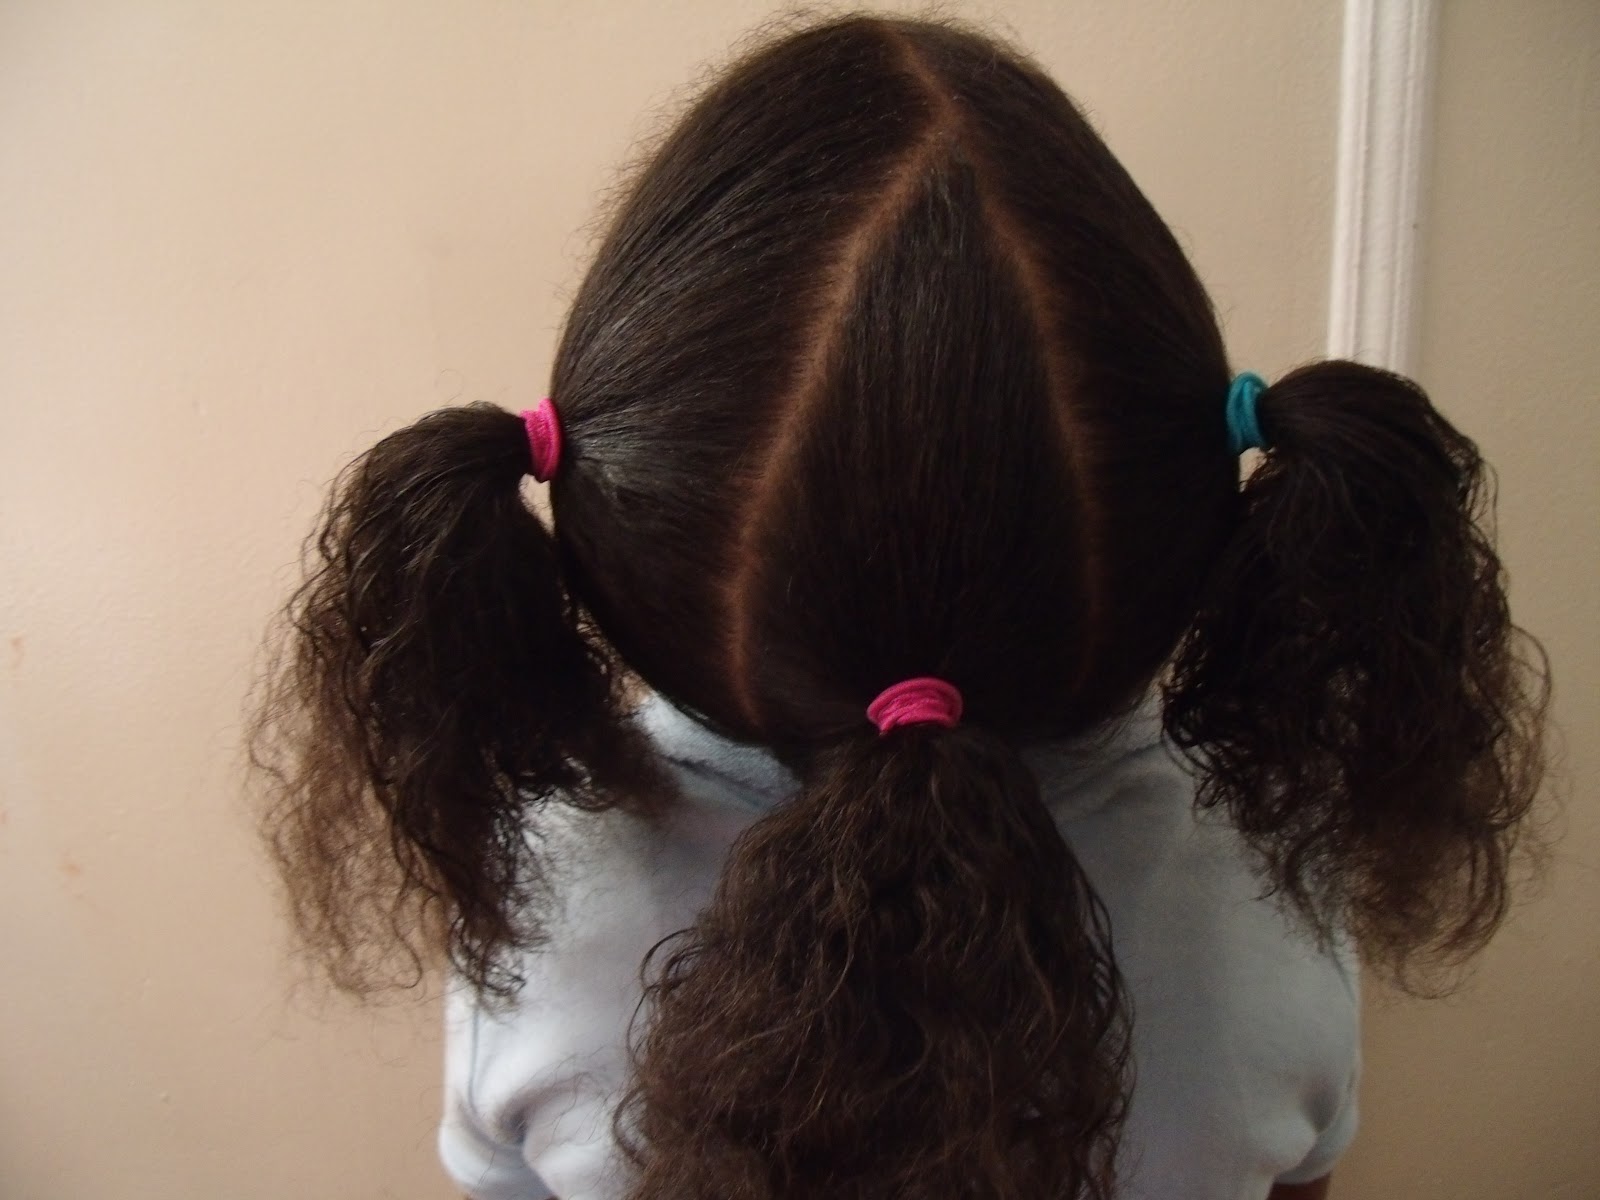
Happy Monday everyone! I wanted to share the hairstyle The Princess is wearing to school today. I like this because it is super easy, it hides her ends, requires little maintenance, and should last 3-4 days. (In her thin, wavy hair, that is pretty good!)

To achieve this style, I started with clean, moisturized hair. Yesterday was 'hair day' in my house, though I wish I had've planned better. No way should we have been stuck in the house doing hair on a sunny, 80 degree day. But the kids were on break last week, and unfortunately, we sort of neglected hair last week, so they were all in need of hot oil treatments and detangling and LOTS of moisturizing. But I digress....

I gave The Princess a hot oil treatment. I used roughly half and half coconut oil and Extra Virgin Olive Oil and heated them together in the microwave until warm. Then I poured the oils into one of those applicators that you use for hair color. I find it much easier, and neater, to apply oil treatments this way. Once the oil was in her hair, I plastic bagged her hair and put a warm towel on top. She stayed like this for about 30 minutes, (well, that was the plan. But we got sidetracked with other heads of hair and baking banana nut muffins. So it ended up being more like 2 hours...but who's counting?) Then we washed her hair with Head and Shoulders 2 in 1, and conditioned with Herbal Essense's Hello Hydration conditioner. I used Shea Moisture's Curl Enhancing Smoothie for moisture, and put a few loose braids in her hair for bed.

This morning, I parted her hair into 3 uneven parts, and put an ouchless elastic band on each part:


yep...couldn't find a third pink band...but they will be hidden anyway.


 Then I braided each part:


Then wrapped each braid around itself and tucked the ends in. If you were going to do this style, you may or may not need an additional band to hold that in place, depending on the length and texture of your child's hair. The Princess did need additional hold:


Then, of course, we had to fancy it up. The Princess chose a Bowsnappers flower that we recently won in a Facebook giveaway, and she chose some of the interchangeable bows to go underneath it:


This style only took about 10 us about 10 minutes this morning, on detangled and premoisturized hair. Not too bad for a style that will last for the next 3 or 4 days. :)

Sunday, January 8, 2012

Freestyle Beaded hairstyle...not sure I like it.

You have probably noticed that we do not do a lot of beaded styles in my home. I used to, then I realized the damage that beads do to those sensitive ends, so not we limit beaded styles for right before trims only. The ends are dead and about to be cut off anyway, so I figure they will do the least damage at this time. If you remember from the quick and easy corn row style The Princess sported over Christmas break, I noted that it is time for a trim. With that in mind, we decided that she will rock beads this week. I freestyled the style, (as usual) and this is what we ended up with:


The bottom half of this style consists of two rows of straight corn rows, braided down and beaded. The top half?! Not sure I like it. That's what happens sometimes when you freestyle; you never know what you are going to get, and sometimes its great, sometimes not so great. The Princess likes her hair, so I guess that's what really matters. It's not that I HATE it, I'm just not so sure. But its in, its done, we won't have to fuss with her hair for the week, so its staying. :) (Oh, and please excuse the dried pancake batter on my child's shirt. She helped make breakfast this morning, and somehow that happened. And somehow the camera picked it up when I did not notice it. I hate when that happens. )

Of course, hair was washed and conditioned before braiding. I used It's Perfectly Natural's Basil and Lemongrass Coil Glaze for hold.

Have you ever freestyled braids, or any hair style, and didn't like the results?

Friday, January 6, 2012

Just another quick and easy 10 minute hairstyle

OK, so this syle was driven by both necessity and YOU. I was running late, and I have received several requests for more 10 minute styles. So here you are:


Those corn rows on the bottom? Ouch. But I told you, we were rushing. And as wrong as it may seem, sometimes I think if I add enough accessories, I can make ANY style look decent enough for a day. (Or two.) And because this style was partly driven by request, I feel the need to add a disclaimer. Of course, whether or not this is trully a 10 minute hairstyle for you and your child depends on the state of your child's hair when you begin styling, and the texture and thickness of your child's hair. This would NOT be a 10 minute haistyle on Li's Bit right now, mainly because her current hair state is a bit sad. (She has been ill for about a week, so her hair has taken the back burner.) And I have looked at all of our previous 10 minute hairstyles and I noticed that they have ALL been done on The Princess. So I promise to come up with some 10 minute hairstyles for my other 2 girls as well....so you can see easy styles on other hair types.

The only things I needed for this style were:
  • Water
  • A comb
  • Shea Moisture's Curl Enhancing Smoothie
  • Barettes and a princess hairholder.
I hope you all enjoy this style. And please feel free to send me more requests, I love them! :)
Happy Friday!

Monday, January 2, 2012

Quick and easy corn rowed hairstyle

Happy New Year! I have had4 kids in my house on vacation from school all week, so hair has been simple and quick. I wanted to share this cute hairstyle that The Princess rocked most of last week:


This hairstyle began with clean hair, and I used Shea Moisture's Curl and Style Milk as a leave-in. I used a very small amount of Shea Moisture's Curl Enhancing Smoothie for hold as well.

First, I separated the hair into 3 sections. The top two sections are larger than the lower section. I'm not sure you can see the size difference in the picture below, though.

 Each of the top two sections was braided into two large braids and secured with ouchless bands. Then I separated the bottom section into two sections.

Both of the smaller sections of hair on the bottom were braided, (not corn rowed) and pulled into the ponies with the rest of the hair.


I added pretties, which were switched daily to match The Princess's outfits. This style took about 15minutes to create and it lasted (gracefully) for about 4 days, but it was in for about a week. (Hey, it's vacation...don't judge me. :) )

Now, looking back at these pictures, I see that The Princess is LONG overdue for a trim. Yes, that is on my to do list....but I am thinking I will give her beads for a week first, seeing as though her ends are damaged and soon to be cut anyway. I hope you all enjoyed your holidays and vacations! We are back to school tomorrow. (Do the happy dance. )


Thursday, December 15, 2011

10 minute hairstyle: Cornrows into a side pony

Yesterday morning was one of those mornings in my house. You know, one of THOSE mornings. The dog ate the scrambled eggs, Li'l Bit couldn't seem to keep pants on, Ally missed the bus, and The Princess couldn't find the perfect hair bow to match her leg warmers. (Yes, that little detail nearly sent her into COMPLETE breakdown mode. Thank you, Asperger's.) So in the midst of all this craziness, hair still needed to be done. Here is the quick and easy 10 minute hairstyle that The Princess rocked today:


The bow problem? Solved, thanks to our handy dandy Bowsnappers! (In my Blue's Clue's voice, of course.) I gave The Princess complete access to our Bowsnappers drawer, (yes, they have a drawer to themselves) and she created this bow. No, it does not match her legwarmers, but she made it, so it was good enough for her. And it stopped a breakdown in it's tracks,  and that's good enough for me!

The rest of our day, thankfully, went a lot more smoothly. And this hairstyle still looked great this morning; all I had to do was redo the ponytail and she was on her way.


Wednesday, November 30, 2011

Heatless styles: 3 Strand Twist into Bantu Knot-outs.

If you want curls or waves without heat, twist outs, braid outs, and bantu knot-outs are all great ways to  get there. One of our favorite ways to curl The Princess's wavy-straight hair is with three strand twist into bantu knot-outs.

This is a style you can do on wet or dry hair. On this occasion, we were working with dry hair. Hair was washed the previous day and conditioned with Shea Moisture's Curl and Style Milk.


Then part the hair, and apply a hold product. (I used It's Perfectly Natural's Basil Lemongrass Coil Glaze.) 3 strand twist the section you are working with down to the end.


       Then twist the  3 strand twist into a bantu knot. Just twist around and around and tuck it under until there is no hair left. Tuck the remaining hair under, if it doesn't stay use an ouchless band to keep it there. 
                   

Then part another section of hair, and do it again. I make diagonal parts, so the parts don't show when you take it all down.

When you are done, you have something similar to this:

To take it out, just untwirl the bantu knots and CAREFULLY untwist the twists. I don't separate the twists too much, because The Princess's hair frizzes easily. The less you manipulate this style, the better it will look. Here is the finished product:


Look at those curls!

Some things to keep in mind with this style:
  • If it is raining or super humid, expect frizz. Just like any other 'down' style, this one is at the mercy of the elements.
  • If you do this style on wet hair, give it sufficient time to dry. If the hair is even slightly wet when you remove the knots and twists, there will probably be frizz. And lots of poof by the end of the day.
  • Part the hair diagonally to avoid the 'scalpy' look.
  • Experiment with different products for hold. Some will add more shine, some will hold better than others.
I hope you found this post helpful. Comments are always appreciated.


Thursday, November 24, 2011

How 'bout them Cowboys?!

Let me start by saying, if you live in the US, Happy Thanksgiving!

The Princess was attending a football party today, and everyone was wearing their favorite team's jersey. Well, if you know anything about me, you know that we just could not stop at the jersey. I mean, what kind of hairie (Ok, that didnt work so well. I was thinking like foodie? lol) would I be if I did not make the hair rep the team as well? Check it out!


Yep, I went there. And unfortunately, I cannot tell you how to get there because I freestyled the star, and probably could not make it look the same way again if I tried. But everyone loved it! Seriously, I got so many compliments on this style, even had a grown man ask me to braid this into his head....Not a cowboys fan, might I add.

I did not get any Thanksgiving pictures of Ally or Li'l Bit because my camera died right after these. :( I hope you all enjoyed your day!

Sunday, November 13, 2011

10 minute hairstyle, and a BIG homemade bow.

Hey y'all, I hope everyone is enjoying their weekend. :)
I just wanted to share the hairstyle that The Princess wore this weekend. You all know that unless we have special plans, I really love my quickie styles for the weekends.


Best part about this hairstyle? The bow! The Princess and I made this bow Saturday morning, and she wore it all weekend. She was so proud of it, she asked me to give her the same hairstyle for school tomorrow, so she can wear the bow in the same way. :)


Monday, November 7, 2011

The Princess's highway braids. And a toothless smile. :)

Actually, I am not quite sure what to call these braids. I was going for more of a patchwork-look, but when I was done, Ally said The Princess's head looked like a highway. I'm not sure if that's because of the crazy spaces between her braids, or because of the style itself, but "Highway Braids" kindof stuck. Although I'm kindof sad my patchwork idea did not work out the way I wanted it to....but I will be trying it again soon, as soon as I can come up with a better idea of how to execute it. :)


Products used:
Spray bottle with water for detangling
 Shea Moisture's Curl Milk as a leave-in conditioner
Shea Moisture's Curl Enhancing Smoothie for hold


 At first, I had intended to keep the braids out...but of course The Princess's super thin, straight hair was unraveling before my very eyes...so I ponied it up with an ouch less band and stuck our homemade flower in there.

Now for the toothless smile:
Looking at the picture now, I see that you can hardly tell. But The Princess lost her 2 front teeth over the last 2 days. They were both super loose, and the first one kindof just fell out. The second one fell out while she and Li'l Bit were wrestling (yes, my girls wrestle....a LOT.) in the living room. Li'l Bit was oh so very proud that she knocked her sister's tooth out. And she told EVERYONE all about it. Not sure what to think about that. 

The Princess has speech therapy at school on Tuesdays because she has a hard time pronouncing her "R"s and "TH" sounds. This should be interesting. :)

Friday, October 21, 2011

10 minute hairstyle....2 braids into a high pony

Actually, this style took about 5 minutes, because that's all the time we had. Something about a dog and a 4 year old and running and clocks being unplugged and no one noticing....you know, life stuff :) So the braids on this style could be better, but I made up for the poor braiding by adding a homemade bow to make The Princess happy. She loves anything mommy makes her. :) Anywho, this is how The Princess wore her hair to school today:


ouch! I just noticed how bad that part is. I know there are some part perfectorers are going to cringe looking at that. But she looked gorgeous none-the-less.
This is actually on of our favorite go-to hairstyles when we are crunched for time. If you need me to explain how to do it, let me know. :)

As always, comments are appreciated. If you like what you see, please pass along our name!
Related Posts Plugin for WordPress, Blogger...