Showing posts with label braids. Show all posts

Wednesday, July 11, 2012

Potective Style: Braided Crown with hidden ends

My babies left me recently to head down south for a family reunion. They were only gone for 4 days, and while I knew they were in good hands with my dad and sister, I was beside myself with worry. My family always jokes with me that my kids come with more instructions than a new swing set (at least I think they're joking), though I can't figure out what the big deal is. Make sure they wear sunscreen. Remind them to brush/floss. Don't let them near water unless someone is DILIGENTLY watching them. No soda. No candy.   No rated R movies. They will try to convince you that they are allowed to watch 'Family Guy', but they are NOT. You know, typical mom stuff. :)

Obviously, one thing I do not want them to have to worry about is hair. So before travelling or overnights away from mommy, I like to make sure the girls' hair is styled and protected. Here is the style that Li'l Bit rocked for the weekend. These pictures were taken 5 days after her hair was styled, and she DID swim without a cap, and she DID sleep without her satin pillowcase, and that IS lint, or grass, or something else in her hair that I did not see until looking at the pictures. But its a cute style, so I thought I'd share anyway:


Starting with freshly washed and conditioned hair, Li'l Bit wore plaited hair for a day to stretch it out. I have found that her hair is easier to braid when it has been stretched somewhat, and I always braid her hair when it is dry. Her hair tends to break when  I braid it while it is wet. 

I parted the hair from ear to ear, but the part was not directly on top of her head, it was back more toward her crown area. Then I began to braid her hair. I freestyled the braids on top, but the ones in the back were braided straight up toward the part. The loose hair (after the cornrowed parts) were braided. Then I started on the left of her head and cornrowed the loose braids toward the center. Then I went to the right side and also braided those to the center. I twisted and tucked and pinned it all under itself until I liked the way it looked. (Did that make sense? I dont know how else to explain it.) I used two bobby pins, and plopped those two cute little clips on top just because she wanted me to. :)

See the hair at the bottom that is left out? I intentionally leave that hair out whenever I am braiding/styling her hair. It is not as long as the rest of her hair, so I am afraid of pulling it. In addition to that, it hurts her if that hair is tugged at all. Since I am more concerned with her comfort and the health of her hair than I am with how it looks, that section is always left out. :)


I really like this style, and I am going to try and get another week out of it. :)


Tuesday, July 10, 2012

Wash n go with side braids

Ally asked me to style her hair this way, and I thought it was too cute not to share. 


Ally has been a travelling li'l lady recently; and after spending two weeks in Illinois with family, stopping home   for a few days before travelling to North Carolina for a family reunion, her hair was in need of some TLC. For the most part, Ally maintains her hair well. She remembers (most of the time) to braid it at night, and moisturizes it daily. But as all of us curly haired girls know, that's not really enough. That's where mommy steps in. :)

I gave her hair a protein treatment with a homemade concoction  I threw together. I used an egg, some Extra Virgin Olive Oil, and some honey. I didn't measure anything (except the egg; I used one), so there is no recipe. I thought I used too much honey, because her hair was super sticky while I was applying the guck, but when I rinsed it out her hair was instantly softer and healthier looking. So maybe it was ok. 

I washed her hair using Nubian Heritage's African Black Soap. We have been using this for about 2 months, and we no longer use shampoo in my house. We all have healthier scalps because of it, and it does not dry our hair like shampoos do. 

After cleansing, I did an ACV (apple cider vinegar) rinse, and conditioned with a Tresemme conditioner. I applied Shea Moisture's Curl Enhancing Smoothie throughout her hair, and parted a section of it off for braids. The part is not down the middle of her head, it is more toward the right side because she wanted it to fall in her face somewhat. It is for this reason that I probably would modify this style if I were doing it on the little girls' hair, I like to try and keep their hair out of their faces. 

I used a little bit of Eco Styler Gel for the braids, but the only thing in the rest of her hair is the Curl Enhancing  Smoothie. 

 I used a blow dryer with a diffuser on the medium heat setting to dry her hair about 90%. As you can see, the SM smoothie doesn't do much to define her curls, but it is great for adding moisture and shine. It also prevented her hair from frizzing up too much, and since we were going for the 'effortless' look anyway, we both loved how it came out.

 The plan is to turn this wash and go into a braid out by spritzing with water and braiding it at night. She does have swim lessons tomorrow, so we shall see how that works out. We will try and check back in tomorrow with an update. :)

Friday, June 22, 2012

Fauxhawk style with beads and bangs on natural hair

I can't tell you how many compliments we got on this style. Li'l Bit, of course, was feeling too full of herself with her bangs (which she always loves) and beads (for which she chose the pattern).

The pattern of the beads was blue, blue, blue, star...or something similar. While I worked on the braids, Li'l Bit had the very important responsibility of placing the beads on the beader. 

Ok, so here is hot we did this:
On freshly washed and properly moisturized hair, I made a "V" shaped part in the front of the head, the point of the "V" towards the crown of the head. Because Li'l Bit's hair is short (shoulder length when stretched), braiding the hair into this shape made the perfect length bangs:


I then made a part down the middle of my daughter's head, sort of extending from the point of the "V". I braided from the sides toward the center, but I made the braids in a sort of brick pattern. That is, the braids on the left and right sides of her head did not meet in the middle, they were on slightly different levels. Its hard to see in the pictures, but braiding this way makes the center look 'fuller' and makes it less difficult to see the parts.

Just for fun, on every other braid, I added beads to the cornrows. To do this, I just cornrowed the hair until I was at the point where I wanted the bead to be. Then I stopped braiding, slid the bead on, and continued braiding where I left off.


Because I am afraid of damaging her ends, I always try not to leave beads in Li'l Bit's hair for more than 3 or 4 days at a time. Life happened, and these stayed in for 6 days. When I removed them, (just the ones on the ends) I co-washed her hair and left the braids in for another 4 days before removing the loose braids (not the cornrows) and she rocked a true fauxhawk, with free hair in the middle. It was gorgeous, total rock star status. :) Unfortunately, I did not get around to taking pictures of her hair after I removed the beads. But she loved the entire style, and so did I.


Monday, April 23, 2012

Braided Fauxhawk on natural hair...great for little girls/teens/adults!

Hi! :) Back with another style I picked up on Pinterest. I'm starting to feel kindof guilty, like I need to be a little more creative and get back to creating my own styles again. The last style I did on Ally, and Li'l Bit, were both from Pinterest. And the now The Princess is wearing a copycat style as well. But I had been in a styling rut for awhile, so at least some hair is getting done, right!?

Side note: See the laundry basket at the top of the stairs? Its calling me. I'm ignoring it. :)


The fauxhawk part....I had a very difficult time trying to figure out what to do with this part. I'd try something, but after half an hour or so realize I didn't like it, so try something else. Her hair is so thin and fine, its very difficult to get a roll or twist of any sort to stick. I'm actually not so sure I like this either, but it survived the night unscathed, so its a go, at least for now. :)

See that small child? Someone should tell her mother to do her hair. ;)


I like this because it is versatile; you can finish the middle in a variety of ways. (As a matter of fact, I am going to try the same style on Li'l Bit, and hers will be finished quite differently.) I promised The Princess that  toward the end of the week, I would take out the roll and she could rock her fauxhawk wild and free, 'rock star style', as she put it.  I like that the braids are small, so it should last a significant amount of time. I like that it didn't take long to finish, maybe about an hour? I like that she loves it. :)

Here is the style I was attempting to copy:


I just love this!


Monday, April 16, 2012

Protective Style for Natural Hair: Braided bantu knots with uneven parts

Happy Monday everyone! I wanted to share the hairstyle The Princess is wearing to school today. I like this because it is super easy, it hides her ends, requires little maintenance, and should last 3-4 days. (In her thin, wavy hair, that is pretty good!)

To achieve this style, I started with clean, moisturized hair. Yesterday was 'hair day' in my house, though I wish I had've planned better. No way should we have been stuck in the house doing hair on a sunny, 80 degree day. But the kids were on break last week, and unfortunately, we sort of neglected hair last week, so they were all in need of hot oil treatments and detangling and LOTS of moisturizing. But I digress....

I gave The Princess a hot oil treatment. I used roughly half and half coconut oil and Extra Virgin Olive Oil and heated them together in the microwave until warm. Then I poured the oils into one of those applicators that you use for hair color. I find it much easier, and neater, to apply oil treatments this way. Once the oil was in her hair, I plastic bagged her hair and put a warm towel on top. She stayed like this for about 30 minutes, (well, that was the plan. But we got sidetracked with other heads of hair and baking banana nut muffins. So it ended up being more like 2 hours...but who's counting?) Then we washed her hair with Head and Shoulders 2 in 1, and conditioned with Herbal Essense's Hello Hydration conditioner. I used Shea Moisture's Curl Enhancing Smoothie for moisture, and put a few loose braids in her hair for bed.

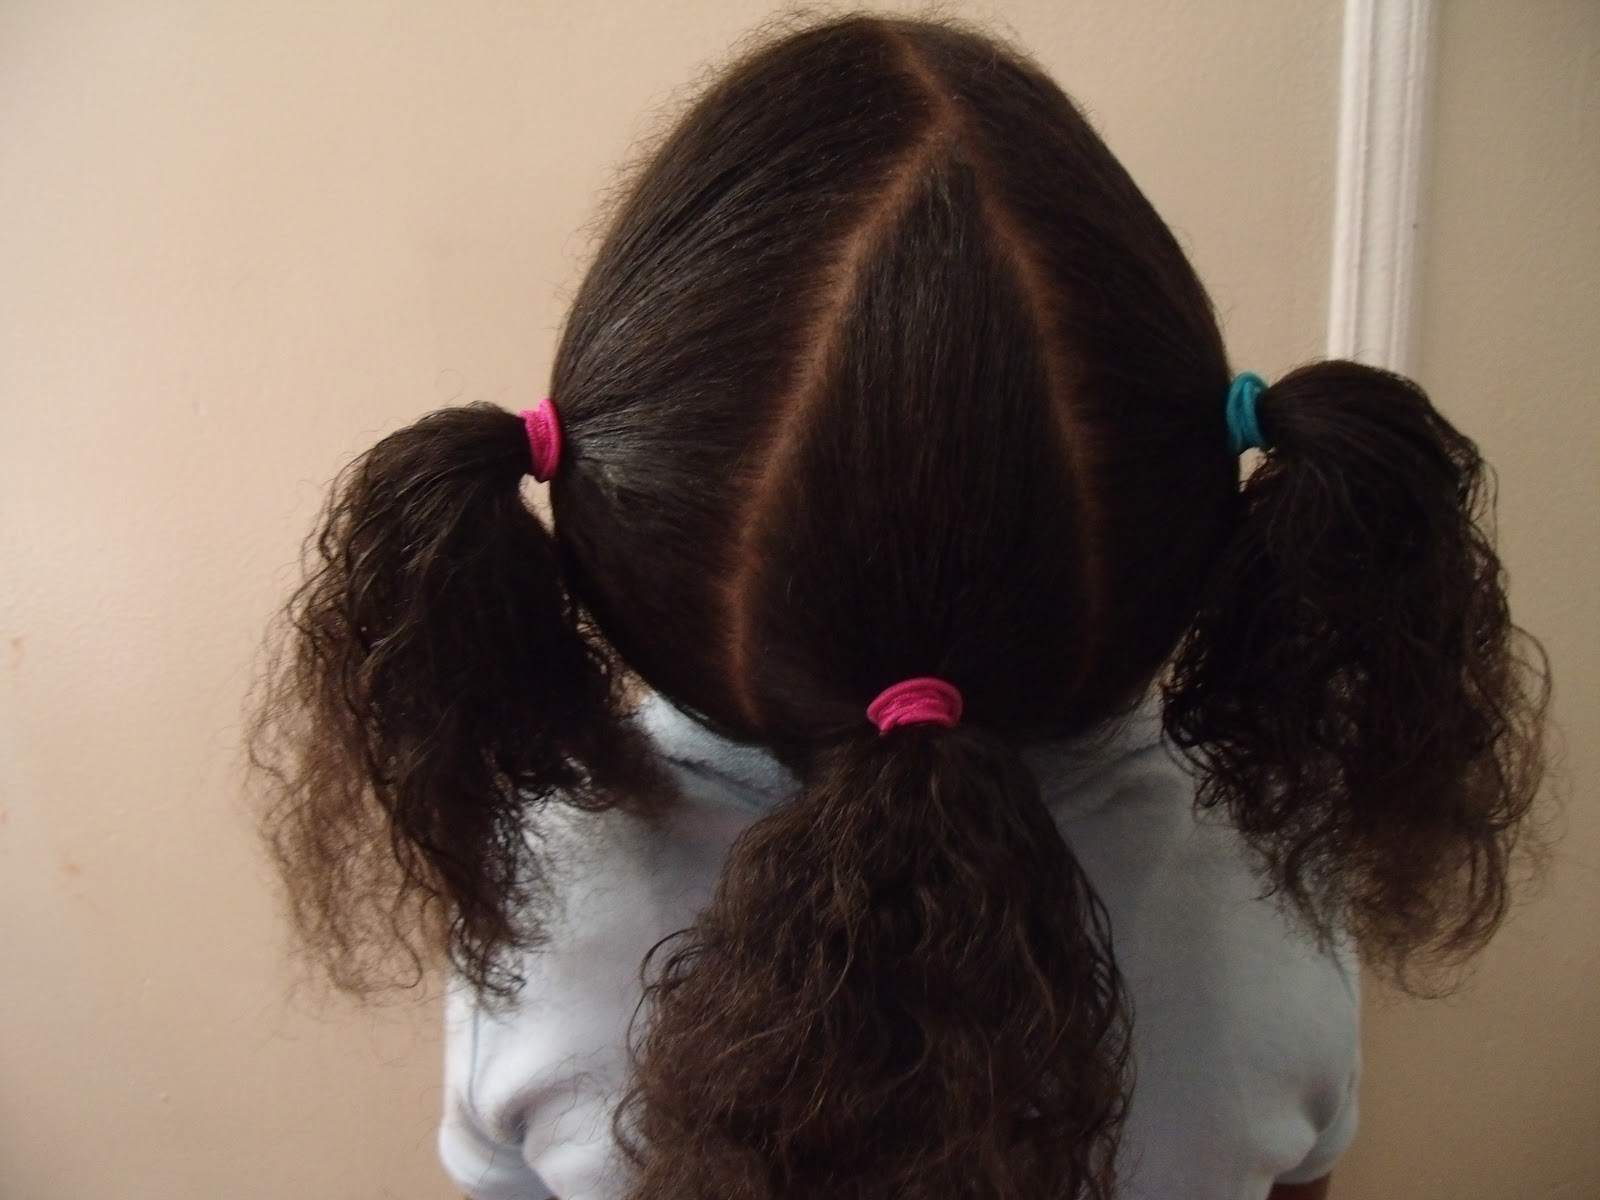
This morning, I parted her hair into 3 uneven parts, and put an ouchless elastic band on each part:


yep...couldn't find a third pink band...but they will be hidden anyway.


 Then I braided each part:


Then wrapped each braid around itself and tucked the ends in. If you were going to do this style, you may or may not need an additional band to hold that in place, depending on the length and texture of your child's hair. The Princess did need additional hold:


Then, of course, we had to fancy it up. The Princess chose a Bowsnappers flower that we recently won in a Facebook giveaway, and she chose some of the interchangeable bows to go underneath it:


This style only took about 10 us about 10 minutes this morning, on detangled and premoisturized hair. Not too bad for a style that will last for the next 3 or 4 days. :)

Wednesday, April 4, 2012

Tween Style-Cornrowed updo from 'The Hunger Games'

Over the past few months, Ally has become more independent with her hair, and has pretty much taken over caring for, and styling her hair. Once or twice a week, I will give it a good detangling/moisturizing; other than that, its been all her.

Wash and go, with clips to take the hair off her face. Classic style, but not so great for everyday wear.


Unfortunately, that means a lot of braid outs, wash and gos and ponytails, because that is really all Ally knows how to do with her hair. I am constantly offering to style her hair, but she always adamantly declines, stating that she no longer wants 'braided styles' or 'elaborate designs'. I understand where these changes are coming from; most of Ally's friends at school wear their hair down most of the time, and while she wants to be 'different', she doesn't want to stand out TOO much.

While I am proud that she is independent enough to know what she wants, and while she has been doing a great job caring for her own hair, I think the occasional protective hairstyle is necessary to give her hair a styling break and help is retain some moisture long term. So I have been scouring the Internet for inspiration; styles that are both simple and mature-ish (to satisfy Ally) and at least semi protective (to satisfy me.) This has proven to be a not so easy task; most styles I present to her and met with a grunt and the rolling of eyes.

Then I found this gorgeous hairstyle on Pinterest:


And when I watched the tutorial, it mentioned that this style was worn in The Hunger Games, I knew I had a shot at it being approved. Ally read all of the books before there was even talk of a movie, and the obsession  fad has become big enough in my house that it may arguably be as worshipped liked as Twilight.(Gasp!) Yep, its THAT serious. Anywho, the style was approved (yay!) and here is our rendition of it:

BTW: This was my first time french braiding. How'd I do?


She loved the way it looked, and I loved the fact that it kept her hands out of her hair for 4 days. If you are interested in doing this, its just two french braids with the ends tucked in and over each other and secured with bobby pins. Confused? Click the Pinterest picture and watch the video. :)


Friday, January 6, 2012

Just another quick and easy 10 minute hairstyle

OK, so this syle was driven by both necessity and YOU. I was running late, and I have received several requests for more 10 minute styles. So here you are:


Those corn rows on the bottom? Ouch. But I told you, we were rushing. And as wrong as it may seem, sometimes I think if I add enough accessories, I can make ANY style look decent enough for a day. (Or two.) And because this style was partly driven by request, I feel the need to add a disclaimer. Of course, whether or not this is trully a 10 minute hairstyle for you and your child depends on the state of your child's hair when you begin styling, and the texture and thickness of your child's hair. This would NOT be a 10 minute haistyle on Li's Bit right now, mainly because her current hair state is a bit sad. (She has been ill for about a week, so her hair has taken the back burner.) And I have looked at all of our previous 10 minute hairstyles and I noticed that they have ALL been done on The Princess. So I promise to come up with some 10 minute hairstyles for my other 2 girls as well....so you can see easy styles on other hair types.

The only things I needed for this style were:
  • Water
  • A comb
  • Shea Moisture's Curl Enhancing Smoothie
  • Barettes and a princess hairholder.
I hope you all enjoy this style. And please feel free to send me more requests, I love them! :)
Happy Friday!

Monday, September 19, 2011

Happy Monday! The Princess told me how to do her hair today and......


 I think it looks great! And check out that bow. She made it herself. Well, kindof. It came from bowsnappers.com/ If you havent heard of the company, I recommend checking them out. I ordered quite a bit of merchandise from them, and we were so excited to have our package delivered over the weekend. I fully intend to do a review on what I recieved, just as soon as Li'l Bit and I are done playing dress up with it all. :) 

If you like what you see, please 'share' it below. And don't forget to 'like' our page on Facebook!

Thursday, September 8, 2011

Introductions-The Princess


This is The Princess. She is 7 years old, and her hair is the biggest mistery to me. I have SUPER curly hair, maybe 3c with some 4b mixed in. Her father is a 4c, super kinky hair, very tight curls. This child's hair is straight! (ok, perhaps a bit wavy when wet.) I will have to post some pictures of her hair when it is down, its a lion's mane. But it keeps styles very well without frizz. I am even hesitant to type her hair, it is so different from anything I have even seen. Anywho, The Princess is currently into gymnastics, ballet, and barbie dolls. She collects money. Yes, money. And she loves her mommy more than anything in this world (awwww, total mommy's girl)
Here are some of our styles we have done on her hair....


Welcome!

Welcome! I created this blog to document and share with you the natural hair care journey I am on with my 3 beautiful daughters. Ally is 11, and has type 3b hair. The Princess is 7, and has 2b hair. Then there is Li'l bit, my 4 year old with a mixture of 4a and 4b hair. So you see, what makes this blog unique is that I need to find the right styles, products, and routines that will work for all of the 3 major curly hair types.This blog will serve as our diary as we navigate through product reviews, try different styles, and build an appreciation and love for our natural hair types. Our journey has begun, and we hope you will join us. Our destination: HAIR GREATNESS!
Related Posts Plugin for WordPress, Blogger...