Showing posts with label Li'l bit. Show all posts

Wednesday, July 11, 2012

Potective Style: Braided Crown with hidden ends

My babies left me recently to head down south for a family reunion. They were only gone for 4 days, and while I knew they were in good hands with my dad and sister, I was beside myself with worry. My family always jokes with me that my kids come with more instructions than a new swing set (at least I think they're joking), though I can't figure out what the big deal is. Make sure they wear sunscreen. Remind them to brush/floss. Don't let them near water unless someone is DILIGENTLY watching them. No soda. No candy.   No rated R movies. They will try to convince you that they are allowed to watch 'Family Guy', but they are NOT. You know, typical mom stuff. :)

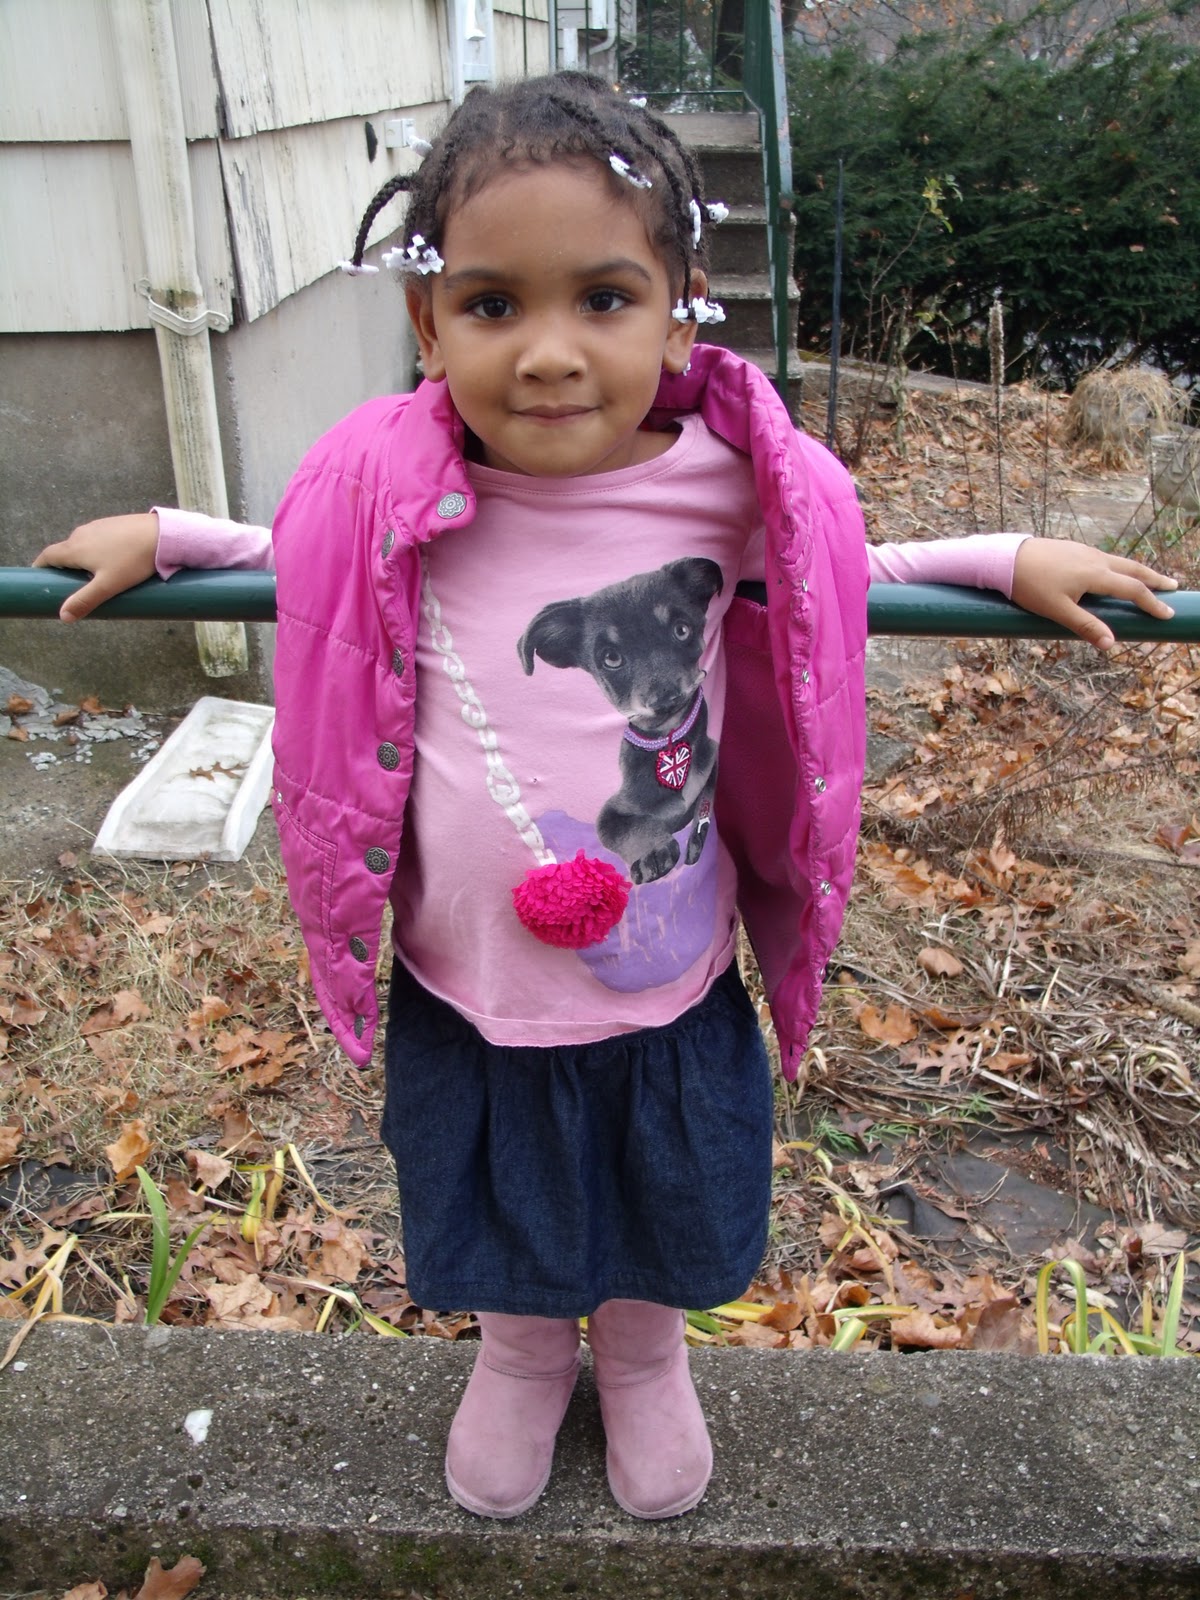
Obviously, one thing I do not want them to have to worry about is hair. So before travelling or overnights away from mommy, I like to make sure the girls' hair is styled and protected. Here is the style that Li'l Bit rocked for the weekend. These pictures were taken 5 days after her hair was styled, and she DID swim without a cap, and she DID sleep without her satin pillowcase, and that IS lint, or grass, or something else in her hair that I did not see until looking at the pictures. But its a cute style, so I thought I'd share anyway:


Starting with freshly washed and conditioned hair, Li'l Bit wore plaited hair for a day to stretch it out. I have found that her hair is easier to braid when it has been stretched somewhat, and I always braid her hair when it is dry. Her hair tends to break when  I braid it while it is wet. 

I parted the hair from ear to ear, but the part was not directly on top of her head, it was back more toward her crown area. Then I began to braid her hair. I freestyled the braids on top, but the ones in the back were braided straight up toward the part. The loose hair (after the cornrowed parts) were braided. Then I started on the left of her head and cornrowed the loose braids toward the center. Then I went to the right side and also braided those to the center. I twisted and tucked and pinned it all under itself until I liked the way it looked. (Did that make sense? I dont know how else to explain it.) I used two bobby pins, and plopped those two cute little clips on top just because she wanted me to. :)

See the hair at the bottom that is left out? I intentionally leave that hair out whenever I am braiding/styling her hair. It is not as long as the rest of her hair, so I am afraid of pulling it. In addition to that, it hurts her if that hair is tugged at all. Since I am more concerned with her comfort and the health of her hair than I am with how it looks, that section is always left out. :)


I really like this style, and I am going to try and get another week out of it. :)


Friday, June 22, 2012

Fauxhawk style with beads and bangs on natural hair

I can't tell you how many compliments we got on this style. Li'l Bit, of course, was feeling too full of herself with her bangs (which she always loves) and beads (for which she chose the pattern).

The pattern of the beads was blue, blue, blue, star...or something similar. While I worked on the braids, Li'l Bit had the very important responsibility of placing the beads on the beader. 

Ok, so here is hot we did this:
On freshly washed and properly moisturized hair, I made a "V" shaped part in the front of the head, the point of the "V" towards the crown of the head. Because Li'l Bit's hair is short (shoulder length when stretched), braiding the hair into this shape made the perfect length bangs:


I then made a part down the middle of my daughter's head, sort of extending from the point of the "V". I braided from the sides toward the center, but I made the braids in a sort of brick pattern. That is, the braids on the left and right sides of her head did not meet in the middle, they were on slightly different levels. Its hard to see in the pictures, but braiding this way makes the center look 'fuller' and makes it less difficult to see the parts.

Just for fun, on every other braid, I added beads to the cornrows. To do this, I just cornrowed the hair until I was at the point where I wanted the bead to be. Then I stopped braiding, slid the bead on, and continued braiding where I left off.


Because I am afraid of damaging her ends, I always try not to leave beads in Li'l Bit's hair for more than 3 or 4 days at a time. Life happened, and these stayed in for 6 days. When I removed them, (just the ones on the ends) I co-washed her hair and left the braids in for another 4 days before removing the loose braids (not the cornrows) and she rocked a true fauxhawk, with free hair in the middle. It was gorgeous, total rock star status. :) Unfortunately, I did not get around to taking pictures of her hair after I removed the beads. But she loved the entire style, and so did I.


Saturday, March 17, 2012

Crossover cornrows with beads on short, natural hair

It's been awhile since I have posted actual hairstyles; mainly because we have been doing simple pigtails and such. Ally has been caring for her own hair (post coming soon), The Princess has been rocking pigtails and simple braided styles. Li'l Bit has really been sticking with afro puffs (which I love). and an all out afro...surprisingly, her favorite style as of late. As a matter of fact, this is what happened last week when she tried to 'make her own afro':

Yep, that comb is stuck in her head. I mean, wrapped around and twisted and all up IN there. :(


I did manage to get that comb out of there without too much damage, and without cutting it at all, but can you believe her hair was in twists before this happened? She woke up, took her hair cap off, and combed out her twists with that very small comb that had no business being used in her hair. So, after that, I made a deal with her: she could rock a 'fro every day if she wanted, but mommy would be the one to comb it out, and we would twist it every night and take it down every day. This satisfied her. :)

This week, she came to me with a bag of beads and the rat tail comb. Subtle, this child is not. But you have to love a girl who knows what she wants. So after co washing her hair with Herbal Essence's Hello Hydration conditioner (we co wash, rinse out completely, then apply more conditioner, and rinse out a little more than half of it. Then I blast her hair with a shot of cold-ish water to seal in the moisture.), here is the style I came out with:


Guess who those fingers belong to? lol.


Unfortunately, I was not able to get clear pictures of the back, (she barely stood still for these 3) but there are just 2 rows of braids going straight down her head. I used Shea Moisture's Curl Enhancing Smoothie for moisture and Kinky Curly's Curling Custard for hold. I am hoping to keep these in for 2 weeks, probably removing the beads after 4 or 5 days. Unfortunately, she has already lost quite a few beads; I am so afraid of damaging her ends I only wrap the rubber bands around 5 or 6 times. With braids this small, that's apparently not enough. And those snappy things just do not stay in her hair at all. Does anyone else have that problem?

I am working in reverse; tomorrow I will post the twisted  style she wore 2 weeks ago. Happy St Patrick's day everyone!!

Wednesday, January 25, 2012

Not-so-Wordless Wednesday...Li'l Bit's first time feeding herself. :)


Happy Wednesday!!
I found these pictures the other day, while I was scrap booking with Ally.
Li'l Bit was about 6 months old, and I decided that I was going to allow her to feed herself for the first time. I strapped her in, put her food on the table and left the room for all of 30 seconds to get my camera. This is what I found when I returned:


She also decided that she would feed herself for the first time that day. :)


Guess I placed the food a little bit too close to her.


But mmmmmm, it was sooo good!
I miss that. Sorry for the Not-so-Wordless Wednesday. I guess this was more for me than you. But I hope you enjoyed it too.

How old were your children when they started feeding themselves?


..

Wednesday, January 11, 2012

Wordless Wednesday-Time with Grandma

We were camping, and I was fortunate enough to (secretly) snap these shots of my youngest daughter having a convesation with my mother. Tha last picture is my favorite. :)


:) Happy Wednesday!

Please link up with us!


Wednesday, December 14, 2011

Reader inspired style: 'cornrowed side ponies with fauxhawk bottom'

This style was inspired by a hairstyle that a reader did on her daughter's hair. She was inspired by this style I did on Li'l Bit, and I was inspired by her style. :)


I think I would call this a 'cornrowed side ponies with fauxhawk bottom' style. (whew! These hairstyle names can get kindof wordy, huh?!) The style that inspired me was done with beads, but I decided to make it a little more of a protective style for Li'l Bit's head, so I eliminated the beads, and rolled the braids into mini Bantu knots to hide and protect the ends. I secured the bantu knots with bobby pins, I am going to look for some mini ones today so they don't show as much.

Products used:
Bee Mine Luscious Moisturizer as a leave-in.
Its Perfectly Natural's Coil Glaze for hold. (This stuff is the bizness. If you haven't tried it, I suggest you do!)
Bobby Pins
That's all!

I think the style is pretty self explanatory, but a few pointers I think are useful when trying this style:
  • For the top half to end up ponytailable, the trick is in the parting. Start your parts off wide and narrow them toward a focal point. They should all meet at this point. That way, you can pony it up....or Bantu knot it, like we did this time. :)
  • The braids in the fauxhawk do not lie directly across from each other. I was trying to figure out how to explain how I arranged them, but I thought it would be easier to just show you:
 
Or something like that. I think you get the idea. The reason I made them diagonal like that is because  I think it is easier to twist the braids into bantu knots when they on top of each other versus being side by side.  I just took 2 braids at a time and bantu knotted them, adding pins for hold because Li'l Bit's hair is so short it would have just unravelled right away.


I love this style, and Li'l Bit did too. Especially when she stuck a huge purple flower clip on top of her head. Sadly, no pictures of that. But you can probably imagine that it looked.....very unique. :)


I hope you enjoyed reading this. This hairstyle was inspired by a picture that a reader posted on our Facebook wall. We love imitating styles, and putting our own spin on them. If you have a style that you would like to share, send us an email, or post it to our wall. We love hearing from you!

Sunday, December 11, 2011

Repurposed style: Half braidout on short Type 4 hair.


I love when a style starts out looking one way, then you can make a few changes and the style looks completely different.A short while ago, I wrote a review on The Pomade Shop's Growth Essentials Rosemary Pomade, and I raved about the amazing braidout it gave us on The Princess's hair. I was curious to see what kind of braid out we would get on Li'l Bit's hair. Here is the style we started with:
I started by rubbing some olive oil into my fingers. I always try not to manipulate Li'l Bit's hair with dry hands, dry hands would take much needed moisture away from her hair. Then I began carefully unbraiding her hair, starting with the braids on the bottom of her head and working my way up. I did not manipulate the hair after unbraiding it, and I did not unbraid the top two braids on each side. I added a headband and this is the finished product:


I love the definition we got from the braid out:
Once again, another great braid out using our new Pomade from The Pomade Shop. I can't wait to try this on Ally's hair once we are done with box braids. 

I just love how much Li't Bit's hair has grown since we have switched over to using products with all natural ingredients. :)

I hope your Sundays are full of smiles and laughter! 

Friday, December 2, 2011

A Li'l Bit of box braids, and some Princess Flair

Please try not to mind the leftover ice cream on my child's forehead....someone should tell her mother to do something about that. :P


Ally has box braids, and Li'l Bit wanted them too. Now, let me tell you something about box braids in Li'l Bit's hair: They curl. I mean, her hair is all actin' like it doesnt know its in braids and either: A) sticks up all over the place in no random order, Medusa-style, or B) Curls up op into itself and sticks to her head...and stays there, like it is hanging on for dear life.

I have tried twisting the braids, (You know, like into flat twists and the similar.)but Li'l Bit's hair is so short and sparse that it is nearly impossible to try and get the braids to reach each other for proper twists. So what happens is that the box braids end up being a lot less than the protective style I intended for them to be, because I hang incredibly heavy barrettes from the ends of them to prevent her from looking like this:


source


Or similar. But I digress.

So I decided to oblige Li'l Bit and give her box braids, and boy was I surprised at how long her hair has gotten! You may remember from Li'l Bit's first length check, that I do not do length checks. (Well, I did, but just that one time. I explain it better in that post. Check it out if you missed it.) So I really had no idea that her hair had grown so much, and I was happy that her hair was actually behaving more like she would like it to. I have no problem with crazy-braids-flinging-themselves-all-over-the-place, but Li'l Bit sees what her sister's hair looks like, and is disappointed when she requests box braids, thinking they will look like this:


And they end up looking like Mr. Coolio above.  But, like I said, her hair grew! And it grew a LOT! So much, in fact, that there was no need to put lots of heavy things on the bottom of her hair to way her braids down. She did want pretties, though, so on day 3, I attached some of those little snappy things that are meant to be used in the place of rubber bands to hold beads in place. I'm sure y'all know what I mean. :)

Then, because Li'l Bit was looking all cute in her box braids and her cute little outfit that she picked out herself, I tried to get a photo shoot out of her. But Li'l Bit was in a different kind of mood, and this is what I got instead:


Yep, that was it. No smiling, no holding still, just a look that says "Hurry up mom, we're gonna be late for Story Time at the library." But isn't she just adorable? And I am taking the braids out right now, after a little over a week in.

Happy Friday!


Monday, November 21, 2011

Hair care changes for colder weather, and a cute protective style for short type 4 hair.

The weather is changing, and  so is the effect our usual routine has on Li'l Bit's hair. The cold weather seems to make her hair drier, and her coils tighter. I find myself having to constantly re moisturize her hair during the day,  and I am using thicker creams to condition and heavier oils to seal in that  moisture. Actually, I am blaming these changes on the weather, and rightfully so. Cold, windier weather does indeed take its toll on hair. But Li'l Bit is barely 4 years old, and her hair is constantly changing regardless of the season. Up until she was 18 months old, her hair was super thin and barely had a curl in it. Now it is thick and coily, and it keeps getting thicker. I love her hair and the changes it goes through, and I like the challenge of finding the right routines, styles, and products to keep up with those changing needs. Here are some of the changes that I am making to her hair care routine for  the upcoming colder seasons:

  • I will be using protective hairstyles as much as possible. I love protective styles like braids and twists anyway because they allow  you to LOAD UP on conditioning products without making the hair look greasy and dirty. I really don't like greasy-looking hair.  I mean, hair that is shiny  because  it is healthy is great, but there is a difference between healthy-shiny hair and hair that looks like someone slathered Crisco all over it.
  • I am washing her hair less often, I was washing it once a week before. Now I am planning on once every 2 weeks, as long as it doesn't start getting itchy and having too much product buildup. This should be easier because she is not playing in the dirt (as much), and sand is no longer a threat because the weather is cooler and we are pretty much done with the beach for now. If I can find a protective style that stays neat in her hair for more than a week, I will probably just co-wash with that style in.
  • I am using more oils, and heavier conditioners and creams.
Sounds good in theory, right? Well, I washed Li'l Bit's hair, and styled it. I used Shea Moisture's Curl and Style Milk as a leave-in, and put several thick braids in her hair overnight. Today, while styling, I re wet her hair as I parted and styled, and applied more Curl and Style Milk, sprayed with It's Perfectly Natural's Turn Me Loose leave-in conditioner, and applied It's Perfectly Natural's Coil Glaze as  styling product for extra moisture and hold. (By the way, this was the first time  I used this product, and I am VERY pleased. Look for that review soon.)

Then I took this picture:

Needless to say, its is not the best picture. Since it is a beautiful day, we decided to go outside for better pictures. Then Li'l Bit rediscovered the leaf pile we created yesterday, and the fun commenced:


Yep, that is my kid doing somersaults in a leaf pile, getting all that yuckiness in her hair that I was planning on not washing for 2 weeks. (See why I said that idea was good in THEORY?! haha!) But I am not that mom that stops her kids' good time to preserve a hairstyle. I CANNOT , WILL NOT be that mom.

Then daddy came outside to join in the fun. After about 5 minutes of watching me wince every time she threw leaves above her head, he offered me a very simple, (and seemingly obvious) solution. "Why don't you just put a hat on her?" Um? Duh!

So we were able to enjoy our time in the leaves, and I think daddy's tip came in time before any serious damage was done. I guess I will have to wait and see if her head starts getting itchy.

I hope you all enjoyed this post! Comments are always welcome. :)

Sunday, November 6, 2011

Li'l Bit's first length check....by request. (And first time using Kinky-Curly)

Ok, so I think this may be hard to believe for a lot of people, but I don't do length checks. Honestly, I don't think length is all that important when it comes down to it with curlies. Curls are supposed to shrink. I love curls, and shrinkage just comes along with having healthy curls. I like seeing how healthy my girls' curls are, I like to stretch the curls and watch them spring back, and I love feeling their hair and seeing how soft it is. It never occurred to me to do a length check, but a Facebook 'like'er inquired the other day about the length of Li'l Bit's hair, and I did get curious to see how what the difference would be between a stretched-out piece of hair and the rest of her curls. So I decided to post a few pictures. :)

Her hair with Kinky Curly products. First time using them on her hair. I am very pleased. I sense a product review coming soon. :)

Hair was ALMOST dry in this picture.
Dancing. If you know Li'l Bit, you know there is ALWAYS dancing. :)


Ok now, the stretch.......(length check...This was after her hair had completely dried) Look at all those beautiful, healthy coils! LOVE this head of hair. :)

And now, just because I am one proud momma, some gymnastics pics from earlier that day. :)


(She was looking over to make sure I was watching, lol. Of course I'm watching, baby!!


Length checks are not something we are going to get into the habit of doing. Like I said, I don't put emphasis on the length of hair at all. After all, Li'l Bit's hair grows out and up...not down. I think if I were to make a big deal about length, she would be more likely to want her hair straight to see that length. So instead of comments like "Look how long your hair has gotten!" we say things like "Look at all this thick, healthy, beautiful hair."

I hope you all enjoyed this post. :)
Related Posts Plugin for WordPress, Blogger...